Article –
19 Jan 2025
How to set up VWO on a Shopify Site and run A/B tests

Read any marketing material from Shopify and you’d be mistaken for thinking they have a seamless and tightly-optimised way for merchants to run A/B tests…
Spoiler: they don’t.
I even got confirmation of this at a New Year’s Eve party last year when I randomly met a Shopify sales rep, and he proudly stated:
“Oh, A/B testing? Yeah you can’t really do that with us”.
Now that’s a bit of an overstatement. I think what he meant was “you can A/B test on Shopify, but it’s really quite annoying”.
Tools like VWO, Convert, and AB Tasty are powerful, but they’re largely built for “normal” websites – static HTML, headless CMS stuff, and predictable DOM structure.
What they weren’t designed for was to work inside Shopify’s dynamic frontend that mixes LIQUID rendering, JavaScript enhancements, and a lot of moving parts.
So if you're working on a custom Shopify build and want to launch clean, reliable experiments without trashing performance or breaking layout, here’s how I approach it.
1. Add the VWO snippet
First, you’ll need to add VWO’s tracking code site-wide. This is what:
Assigns users to a test variant
Loads your experiment config
Injects the DOM changes client-side.
Add the VWO snippet in your theme.liquid just before the closing </head> tag. It needs to load early to avoid flicker.
You can load it via GTM, but I prefer adding it directly for better control and speed.
2. Understand how VWO interacts with Shopify’s frontend
Shopify’s frontend has a few quirks that make A/B testing trickier than expected:
Many components are rendered dynamically (e.g. quick add modals, cart drawers, header search).
DOM elements may not exist immediately after page load.
CSS class names can change based on theme structure, and app blocks can modify HTML without warning.
What this means for VWO:
The Visual Editor is unreliable for complex tests.
DOM manipulation needs to be delayed or retried, especially on pages with JavaScript-enhanced components.
Using
data-*attributes or stable, BEM-style class names (e.g. hero-banner__title) makes test logic much easier to maintain.
Best practice? Avoid relying on styling classes alone – use data-* attributes in your Liquid where possible for long-term testability.
3. Writing a stable test (for Shopify)
Let’s say you want to change the product title on a PDP and add urgency text below the Add to Cart button.
✅ VWO variation JS snippet example
To see what this looks like in VWO's editor:
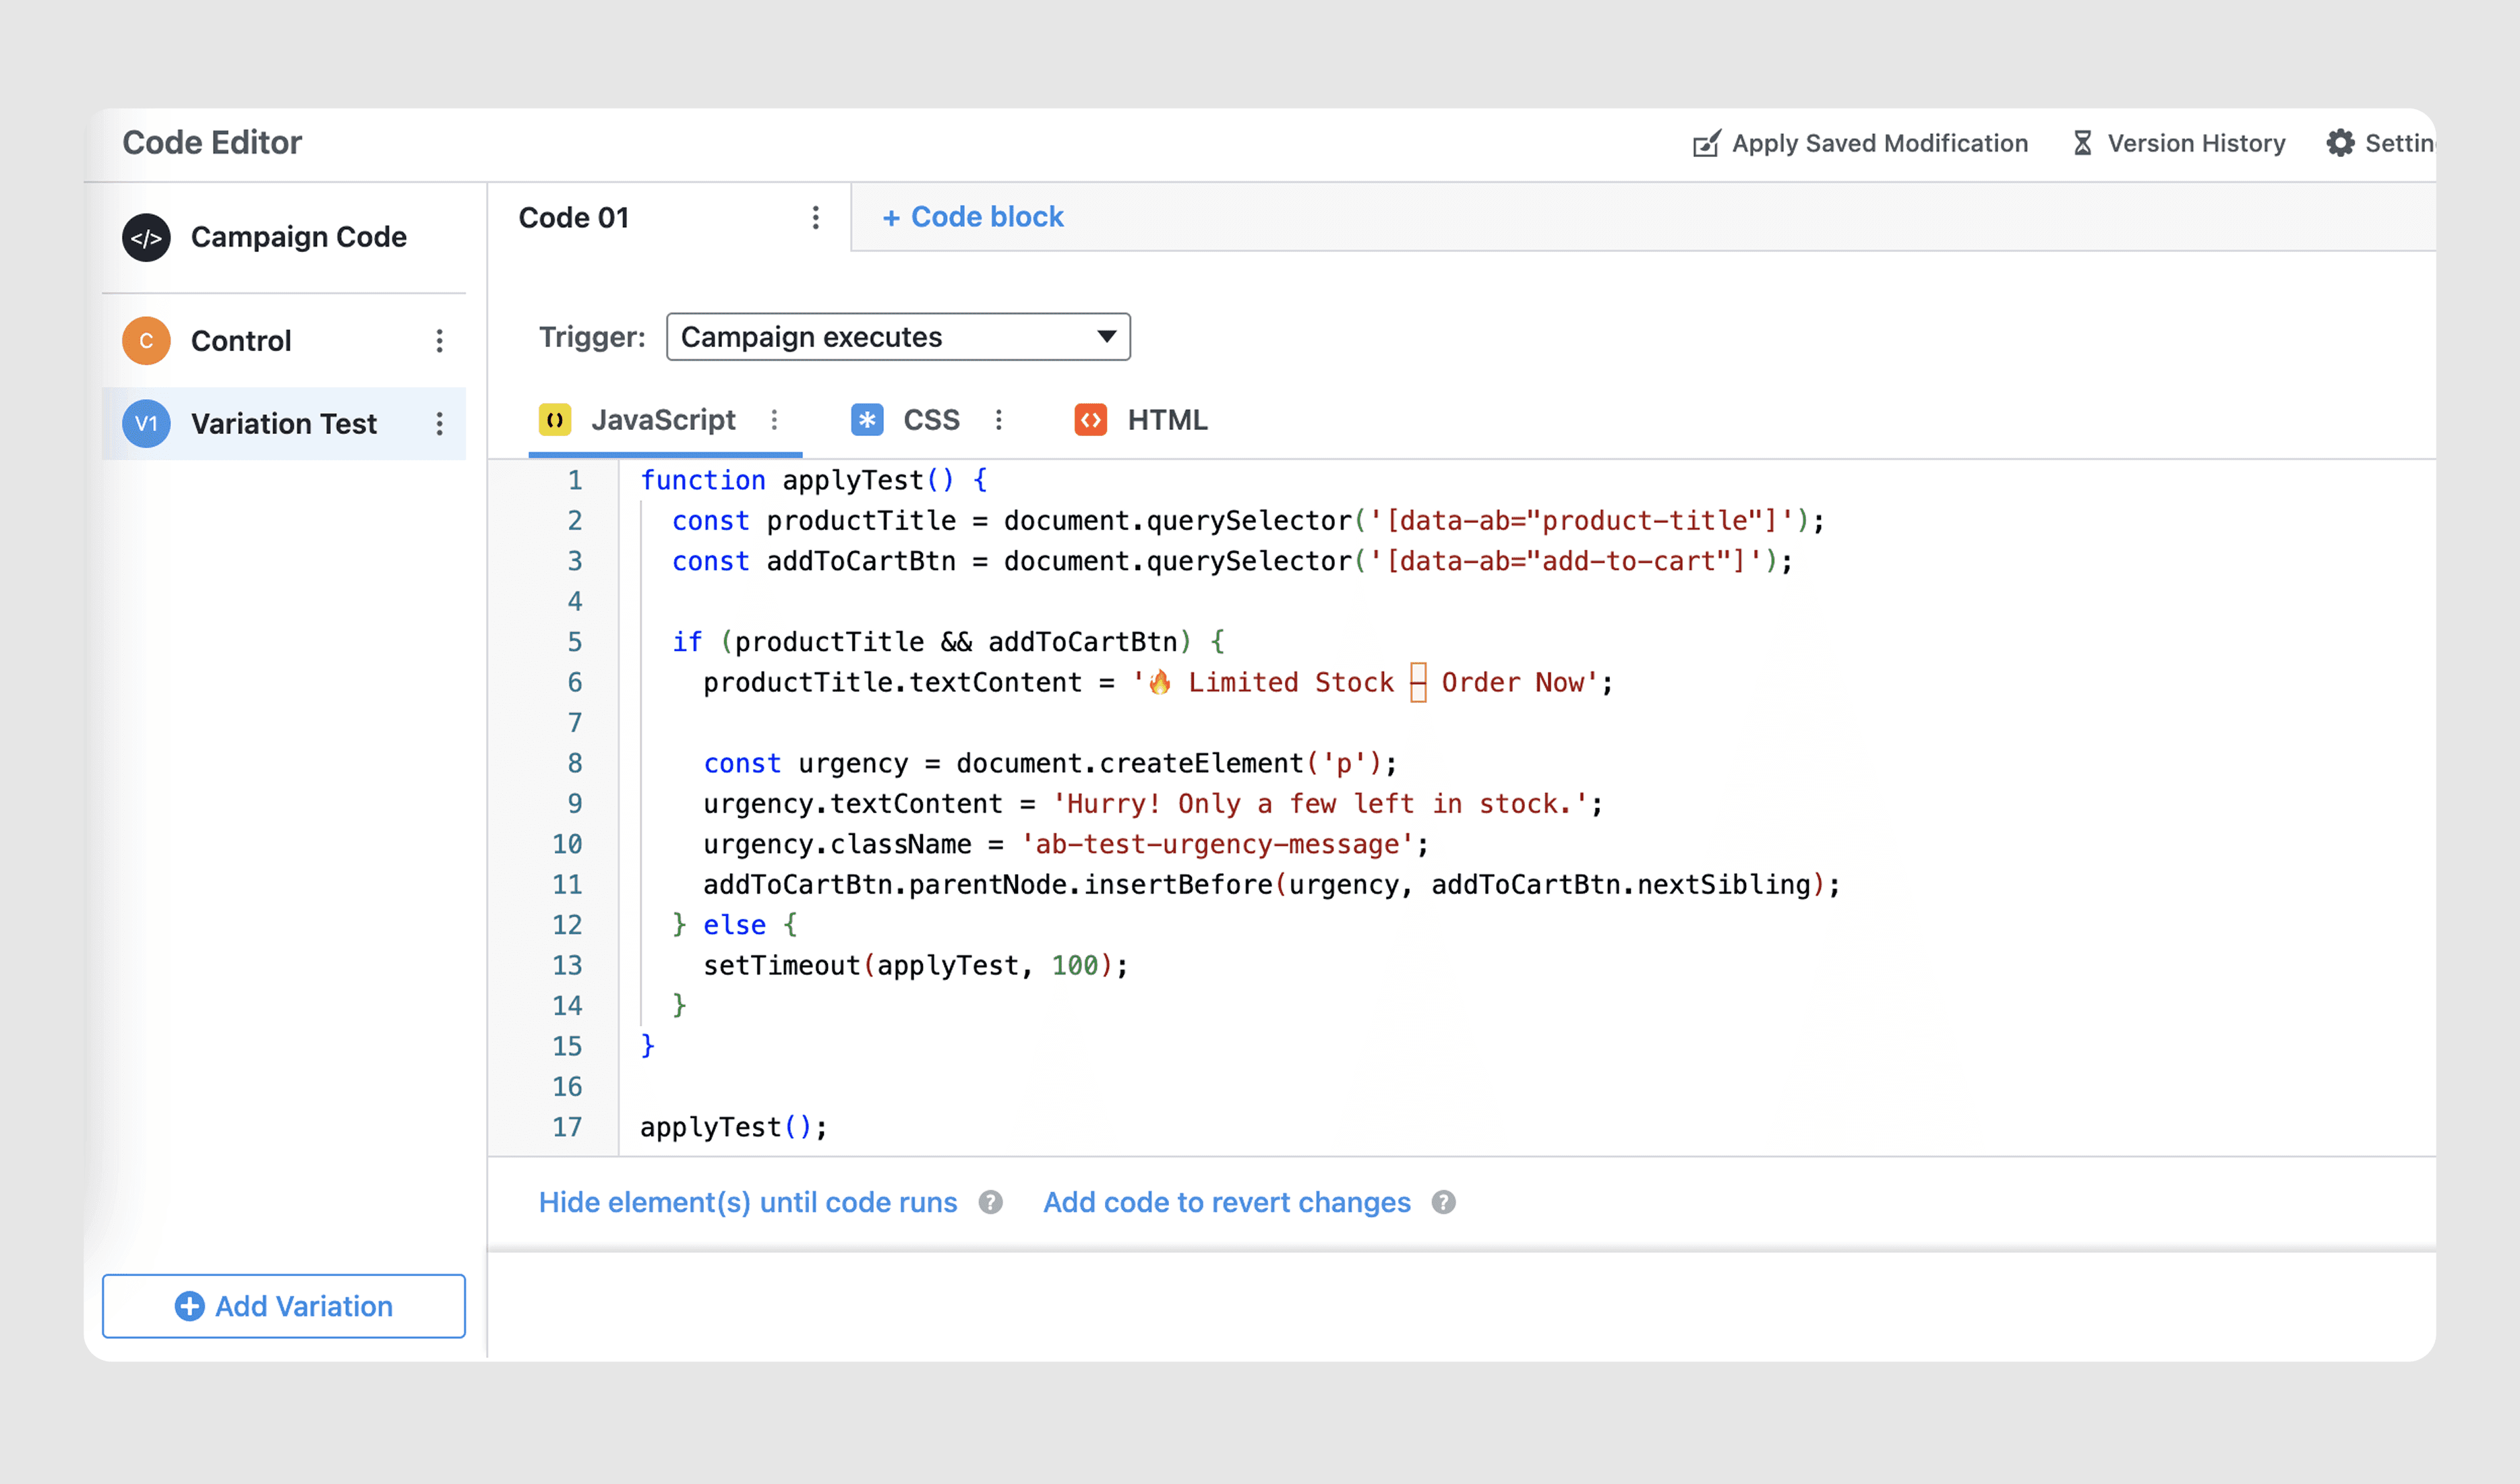
In your Shopify theme, you’d mark up key elements like this:
This approach avoids fragile selectors, improves QA, and makes test scripts easier to reuse or refactor. It’s especially useful when your CSS classes change often or are shared across multiple elements.
4. Bonus: use Metafields to manage A/B variants more cleanly
This part is a little technical – but really helpful if you're testing larger content or layout ideas that may go live permanently. (E.g. more than just a line of text).
Important: This isn’t server-side A/B testing. Shopify’s Liquid can’t read browser cookies or localStorage. So this doesn’t make your tests “server-rendered.” But it does make your test code cleaner and your content easier to manage.
Create a metafield in your Shopify product schema, e.g. product.urgency_text.
In Liquid, output the content as a DOM element with a clear data attribute:
In your VWO test, toggle its visibility based on the assigned variant:
This way:
Content is editable via Shopify admin or a metafield app.
You don’t inject HTML via JS, just toggle it.
Post-test rollouts are as easy as removing a visibility check.
⚠️ Why it’s not for everyone:
Requires some coordination between dev and content teams.
Needs consistent markup and naming discipline.
Still uses client-side logic for variant assignment (not “true” SSR testing).
But if you're running tests that might stick around – or you want to keep scripts lean – it’s absolutely worth considering.
Final thoughts
Testing on Shopify isn’t the worst thing in the world – but it’s not quite plug-and-play either. Especially if you’re working in a modular, modern codebase like Dawn.
A bit of upfront structure – clear data attributes, scoped test logic, smart use of metafields – goes a long way.
The Visual Editor isn’t your friend here. But with clean markup and a few reusable JS snippets, you can build tests that are stable, scalable, and flicker-free.